How to Install a TV Enclosure Without Damaging Your Walls: A Complete Guide
lianMichael
Are you looking to protect your TV while maintaining the integrity of your walls? Installing a Outdoor TV enclosure doesn't have to be a daunting task that leaves your walls riddled with holes. In this comprehensive guide, we'll walk you through the process of setting up a TV enclosure without causing any damage to your precious walls. Whether you're a renter, a homeowner with pristine walls, or simply someone who wants to avoid unnecessary repairs, we've got you covered. Let's dive in and discover the secret to a sleek, secure TV setup that keeps your walls intact!
1. Introduction
Picture this: you've just moved into a new apartment with freshly painted walls.The last thing you want is to mar those perfect surfaces with unsightly holes from mounting a Outdoor TV enclosure. But fear not! There are clever ways to install a TV enclosure that will keep your walls as pristine as the day you first laid eyes on them.
In this article, we'll explore various methods to install a Outdoor TV enclosure without so much as scratching your walls. We'll cover everything from choosing the right enclosure to step-by-step installation guides and even some handy maintenance tips. By the time you finish reading, you'll be equipped with all the knowledge you need to set up your TV enclosure like a pro, all while keeping your security deposit (and your walls) safe and sound.
2. Benefits of TV Enclosures
Before we dive into the nitty-gritty of installation, let's take a moment to appreciate why TV enclosures are such a game-changer. These nifty devices offer a plethora of advantages that go beyond mere aesthetics. Here's why you might want to consider a TV enclosure:
-
Protection from the elements: If you're planning to set up an outdoor entertainment area, a TV enclosure is a must. It shields your precious screen from rain, dust, and sunlight, extending its lifespan significantly.
-
Enhanced security: TV enclosures can be locked, deterring theft and preventing unauthorized access. This is particularly useful in public spaces or shared living situations.
-
Improved aesthetics: Let's face it, a sleek TV enclosure can elevate the look of any room. It's a great way to hide unsightly cords and create a more polished appearance.
-
Temperature control: Many enclosures come with built-in cooling systems, ensuring your TV doesn't overheat during those marathon viewing sessions.
-
Glare reduction: Outdoor enclosures often feature anti-glare screens, making it easier to watch your favorite shows even in bright sunlight.
-
Child and pet protection: If you have little ones or furry friends at home, an enclosure can prevent accidental damage to your TV.
With these benefits in mind, it's easy to see why TV enclosures are becoming increasingly popular. Now, let's move on to choosing the right one for your needs.
3. Preparing for Installation
Proper preparation is key to a smooth, damage-free process. Here's what you need to do:
-
Gather your tools: While we're aiming for a non-damaging installation, you'll still need some basic tools. These may include:
-
Measuring tape
-
Level
-
Pencil
-
Cleaning supplies
-
Screwdriver (for assembling the enclosure, not for wall mounting)
-
Choose your location: Decide where you want to place your TV enclosure. Consider factors like viewing angle, glare, and access to power outlets.
-
Clean the area: Thoroughly clean the wall where you'll be installing the enclosure. This is especially important if you're using adhesive mounts.
-
Measure and mark: Use your measuring tape and level to mark where the enclosure will go. Double-check your measurements to ensure everything is straight and centered.
-
Plan your cable management: Think about how you'll route cables to keep everything tidy. We'll cover this in more detail later.
-
Assemble the enclosure: If your enclosure requires assembly, do this before attempting to mount it. Follow the manufacturer's instructions carefully.
-
Test fit: Before committing to any mounting method, do a test fit to ensure everything lines up correctly.
By taking these preparatory steps, you'll set yourself up for a successful, stress-free installation process. Now, let's explore some non-damaging installation methods.

4. Non-Damaging Installation Methods
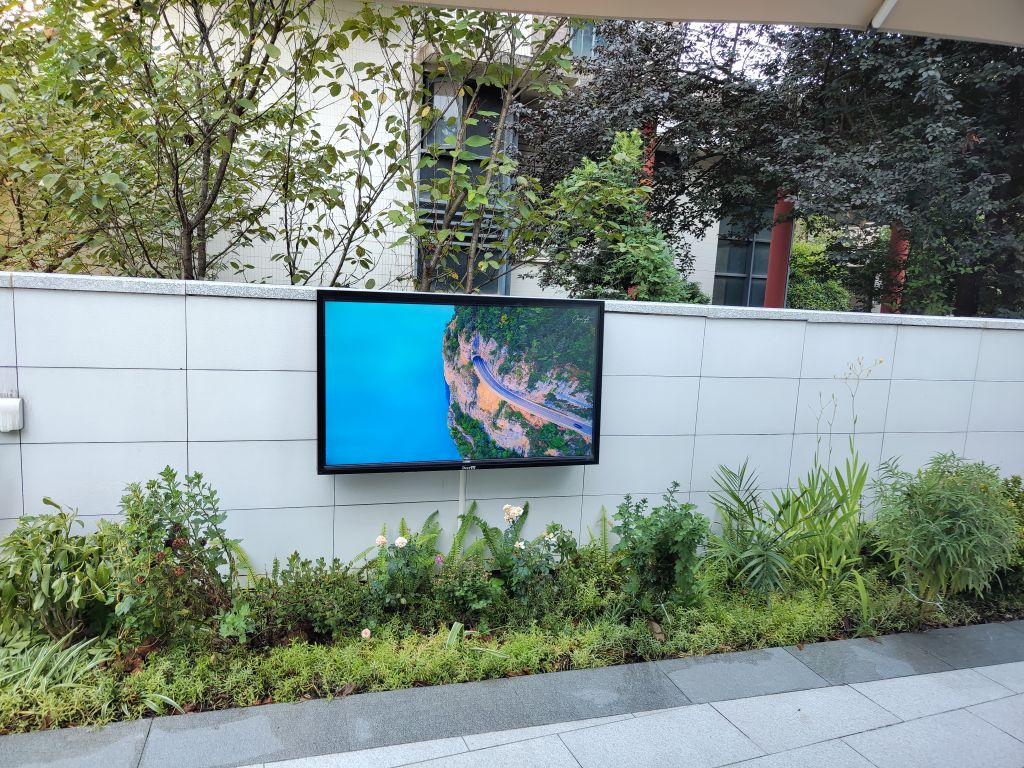
Co-extrusion Wall Cladding is a good choice.
Kosa provides various styles of composite wall cladding, including WPC wall cladding and Co-extrusion wall cladding, among which Co-extrusion wall cladding has more exquisite design, richer colors, better feel and more durable. It’s made from wood plastic composite core and modified plastic covering, the covering is like a 360°shield to prevent the core from water, UV, fungus, panting and scratching.
The natural surface and stable quality make Co-extrusion wall cladding or Capped wall cladding more and more popular in garden decoration and exterior building materials. The outer co-extrusion layer of Co-extrusion wall cladding is made of high-performance moisture-proof polymer, which protects the composite core from water, UV rays, fungus and scratches.

Designed to withstand harsh environmental conditions, co-extrusion wall cladding is ideal for both indoor and outdoor applications. It does not warp, fade, or crack under exposure to the elements.
The lightweight and versatile nature of co-extruded panels makes it easy to install brackets and mounts for your outdoor TV. This simplifies the installation process and allows for precise placement.
Co-extrusion wall cladding is available in various colors and finishes, allowing for a seamless and stylish integration of the TV into your outdoor space. It enhances the overall look of your patio or garden area.


5.Step-by-Step Installation Guide
Now that we've covered the various non-damaging installation methods, let's walk through a general step-by-step guide for installing your TV enclosure. We'll focus on using adhesive mounts, as they're a popular choice for wall-mounted enclosures without drilling.
Step 1: Prepare the Co-extrusion Wall Cladding
Clean the wall thoroughly with rubbing alcohol to remove any dirt, dust, or oils.
Allow the wall to dry completely.
Step 2: Mark the installation area
Use a measuring tape and level to mark where the enclosure will be placed.
Double-check your measurements to ensure everything is straight and centered.
Step 3: Prepare the adhesive mounts
If your adhesive mounts came with a protective backing, remove it.
Do not touch the adhesive surface with your fingers.
Step 4: Attach the mounts to the enclosure
Follow the manufacturer's instructions to attach the adhesive mounts to your TV enclosure.
Ensure they're securely fastened and positioned correctly.
Step 5: Position the enclosure
Carefully line up the enclosure with your wall markings.
Use a level to ensure it's straight.
Step 6: Adhere the enclosure to the wall
Press the enclosure firmly against the wall, applying even pressure to all adhesive points.
Hold in place for the amount of time specified in the adhesive instructions (usually 30-60 seconds).
Step 7: Allow the adhesive to cure
Do not hang your TV or apply any weight to the enclosure for at least 24 hours, or as specified by the adhesive manufacturer.
Step 8: Install your TV
Once the adhesive has fully cured, carefully install your TV into the enclosure following the manufacturer's instructions.
Step 9: Manage cables
Use cable ties or a cable management system to neatly organize any cords or wires.
Remember, these steps may vary slightly depending on your specific enclosure and mounting method. Always refer to the manufacturer's instructions for the most accurate guidance.

